Established as one of the most sought-after online betting platforms, Pin-Up Casino has steadily carved its niche in the global gambling arena. Whether you’re a novice looking to take your first step into the exhilarating realm of online gambling or a seasoned enthusiast in search of new thrills, Pin-Up Casino promises an experience like no other.
Introduction to Pin Up Casino
Pin-Up Casino, a thrilling online gaming platform that has taken India by storm. Pin Up Casino Online is not just another casino; it’s an immersive experience that caters to players of all backgrounds and preferences. In this comprehensive introduction, we’ll provide you with a glimpse into the world of Pin Up Casino Legal in India, its history, mission, and what sets it apart from the rest.
Pin Up Casino is more than just a place to wager and win; it’s a virtual destination where entertainment, excitement, and opportunities collide. Founded with a vision to provide players with a safe and enjoyable gaming environment, Pin Up Bet has rapidly become a favorite among Indian gamers.
Pin-Up Casino is a renowned name in the online gaming industry, known for its wide range of games, exceptional bonuses, and top-notch customer service. Pin Up Casino, its game selection, legality in India, betting options, welcome offers, account creation process, mobile experience, customer support, user perspectives, and frequently asked questions.
One of the standout features of Pin Up Casino’s game selection is the emphasis on quality. Every game is handpicked from top-tier software providers known for their exceptional graphics, sound, and fair gameplay. This ensures that every spin of the slot reels or card dealt at the table is a high-quality experience that keeps you coming back for more.
Pin Up Casino regularly updates its game library, introducing new titles and innovative gameplay options. This means that even if you’re a frequent visitor, you’ll always have something fresh and exciting to explore. Whether you’re into live dealer games, progressive jackpot slots, or classic roulette, Pin Up Casinohas it all within easy reach.
Pin Up Casino Game Selection
Pin Up Casino offers a diverse gaming experience catering to all types of casino enthusiasts. Whether you’re a fan of classic slot machines, love the strategy of table games, or crave the live interaction of live dealer experiences, this casino has something for everyone.
| Game Category | Description |
| Slot Machines | Experience a wide variety of slots, from classic reels to modern slots with immersive graphics and bonus features. |
| Table Games | Classic games like Blackjack, Roulette, Baccarat, and more. Whether you’re a novice or a pro, there’s a table waiting for you. |
| Live Dealer Experiences | Interact in real-time with professional dealers and enjoy the thrill of live casino games broadcasted directly to your device. |
With such a comprehensive game selection, Pin Up Casino ensures that players always have a fresh and exciting game to play, promising endless hours of entertainment.
Top Picks at Pin Up Casino
At Pin-Up Casino, the spotlight shines brightly on a selection of top-notch games that have captured the hearts of players worldwide.
Among the standout titles are thrilling slots that transport you to different worlds and eras, from ancient civilizations to futuristic landscapes. Games like “Book of Ra,” “Starburst,” and “Gonzo’s Quest” have achieved iconic status in the world of online slots, and you can experience their excitement at Pin-Up Casino Website.
If you prefer the strategic thrill of card games, the likes of “Texas Hold’em” and “Baccarat” await you in the virtual card rooms. These games pit your skills and tactics against opponents, creating an intense and intellectually stimulating gaming experience.

The Pin-Up Casino collection of top games also extends to the roulette wheel, with variants like European, American, and French Roulette offering diverse betting options and endless excitement. Spin the wheel and watch the ball land on your lucky number.
Moreover, Pin-Up Casino’s top games are not limited to the virtual realm. The live gaming arena brings the authentic casino experience to your screen, complete with professional dealers and real-time interaction. Whether you’re into live roulette, blackjack, or poker, you can immerse yourself in the thrill of live gameplay.
| Slot | Free Spins Bonus |
| Roulette | Deposit Match Bonus |
| Jackpot Slot | Progressive Jackpot |
| Blackjack | Cashback Offer |
| Live Roulette | Live Casino Bonus |
Live Gaming

Experience the pulsating energy and authentic atmosphere of a brick-and-mortar casino without leaving the comfort of your home through Pin-Up Casino’s Live Gaming Arena. This innovative feature brings the excitement of live dealer games directly to your screen, creating an immersive and interactive gaming experience like no other.
Live dealer games are a fusion of cutting-edge technology and real-world casino hospitality. In the Live Gaming Arena, you’ll find a variety of classic table games, such as blackjack, roulette, baccarat, and poker, all hosted by professional and friendly dealers who interact with you in real-time via high-definition video streaming.
Pin-Up Casino’s Live Gaming Arena caters to players of all levels. You can join tables with varying betting limits, ensuring that you can play according to your comfort and budget.
In addition to traditional casino games, Pin-Up Casino’s Live Gaming Arena also features unique and innovative live game shows. Games like “Dream Catcher” and “Monopoly Live” combine elements of entertainment and chance, providing a refreshing twist on the traditional casino experience.
Diverse selection of live dealer games available at Pin-Up Casino, provide insights into the technology that powers them, and share tips on how to make the most of your live gaming adventure.
Live gaming, where you can interact with real dealers and immerse yourself in an authentic casino atmosphere from the comfort of your home.
- Real-time interaction with professional dealers
- HD streaming for a crystal-clear gaming experience
- Wide variety of table games such as Blackjack, Roulette, and Baccarat
- Chat features that allow you to communicate with the dealer and other players
- Games are available 24/7, ensuring you can play whenever you want
- Seamless integration on both desktop and mobile platforms
Slot Machine
If you’re a fan of online slots, Pin-Up Casino has a treasure trove of slot machine waiting for you. These offer a visual preview of the most exciting and popular slot games available on the platform, allowing you to get a taste of the action before diving in.
Pin-Up Casino regularly updates its slot machine library to showcase new game releases, ensuring that you stay up-to-date with the latest and greatest in the world of online slots. Whether you’re interested in classic fruit machines, adventurous themed slots, or progressive jackpots with life-changing prizes, you’ll find it all in the slot machine collection.
Get a sneak peek into the world of slot machines with exciting that showcase the gameplay and potential wins.
- Wide array of slot titles from top gaming providers
- Classic 3-reel slots to the latest 5-reel slots
- Progressive jackpot slots with massive prize pools
- Themed slots inspired by movies, TV shows, and popular culture
- Bonus rounds, free spins, and unique game features
- Regular updates with the latest slot games
Spin the wheel
Roulette are a beloved category of casino games that combine luck and anticipation in a delightful package. At Pin-Up Casino, you’ll find a selection of these entertaining games, each offering a unique and exhilarating spinning experience.
The concept of Spin-the-Wheel games is simple: you place your bet, spin the wheel, and watch with bated breath as it comes to a stop, revealing your fate. These games are known for their simplicity, making them accessible to players of all skill levels, from beginners to seasoned casino enthusiasts.

Pin-Up Casino’s Spin-the-Wheel games come in various forms, each with its own set of rules and potential rewards. From classic Wheel of Fortune-style games to innovative variants with exciting twists, there’s a Spin-the-Wheel game for everyone’s taste.
Not only are Spin-the-Wheel games easy to understand and play, but they also offer the thrill of uncertainty and the potential for significant wins. Whether you’re aiming to hit the jackpot or simply enjoy the excitement of spinning, these games provide a captivating and suspenseful gaming experience.
Spin-the-Wheel games available at Pin-Up Casino, their rules, strategie and the excitement they bring to the gaming table. Tips on how to make the most of your Spin-the-Wheel adventures, ensuring that you’re well-prepared for your next spin.
Test your luck with Pin Up’s spin-the-wheel games, where each spin holds the promise of big rewards.
- Experience the excitement of spin-the-wheel games like Wheel of Fortune, where you can spin to win incredible prizes and bonuses.
- Spin-and-win games offer a thrilling combination of luck and strategy, making them a favorite among casino enthusiasts.
- Keep an eye out for special spin-the-wheel promotions at Pin Up Casino for even more chances to spin your way to fantastic rewards.
Traditional Andar Bahar Thrills

For players looking to indulge in a traditional Indian card game, Pin-Up Casino offers the beloved Andar Bahar. This classic game, deeply rooted in Indian culture, has found a home within Pin-Up’s diverse game selection, providing players with an authentic and engaging gaming experience.
Andar Bahar, also known as Katti, is a straightforward yet thrilling card game that revolves around choosing a side, Andar (left) or Bahar (right), as the winning position for a selected card. Players place their bets, and the dealer proceeds to draw cards until the chosen card appears on either side. The anticipation and excitement as the game unfolds make Andar Bahar a popular choice among Indian players.
Pin-Up Casino’s Andar Bahar game stays true to the traditional rules and gameplay, offering an immersive environment that captures the essence of this age-old card game. Whether you’re a seasoned Andar Bahar player or new to the game, Pin-Up’s version ensures a seamless and enjoyable experience.
Understanding the mechanics of Andar Bahar is essential for maximizing your enjoyment and potential winnings. We’ll walk you through each step of the game, from placing your bets to watching the cards being drawn and determining the outcome. Whether you’re playing for fun or aiming for substantial wins, our detailed explanation will equip you with the knowledge you need to make informed decisions at the Andar Bahar table.
Andar Bahar that you might encounter at Pin-Up Casino. While the core rules remain the same, some versions may introduce unique features or side bets, adding an extra layer of excitement to the game.
Andar Bahar at Pin-Up Casino, where tradition meets modern gaming for an unforgettable card-playing experience. For fans of traditional Indian card games, Pin Up Casino offers Andar Bahar, a game that combines simplicity with entertainment.
- Experience the classic Indian card game in digital format
- Simple gameplay suitable for both beginners and experts
- Play either the traditional or modern variations
- Interactive user interface for a realistic gaming experience
- Opportunities to place side bets for increased winnings
- Available in both solo play mode and live casino with real dealers
The Game of 21: Blackjack Mastery

For fans of strategy and skill-based card games, Pin-Up Casino offers the classic game of Blackjack, also known as “21.” This iconic card game is a favorite in both land-based and online casinos, known for its simple rules and the opportunity for players to employ various strategies to beat the dealer.
Blackjack is a game that pits your wits against the dealer’s hand. The objective is clear: achieve a hand value as close to 21 as possible without exceeding it. You’ll be dealt two cards initially and have the option to “hit” to receive additional cards or “stand” to keep your current hand. The game’s excitement lies in making strategic decisions based on your hand and the dealer’s upcard.
Pin-Up Casino’s Blackjack offering is a blend of traditional gameplay and modern technology. You can choose from various Blackjack variants, each with its own unique twists and side bets. Whether you’re a seasoned Blackjack player or new to the game, Pin-Up Casino provides an inviting environment to test your skills and strategy.
Pin-Up Casino, strategies, and variations. Tips on how to play Blackjack effectively, maximize your odds of winning, and enjoy the strategic challenge it offers.
- Experience the timeless card game that combines skill and luck
- Varieties available: Classic, European, Atlantic City, and more
- Engaging side bets like Perfect Pairs and 21+3
- Interactive and intuitive user interface for smooth gameplay
- Opportunity to apply strategies and improve your winning odds
- Live dealer versions available for an immersive casino experience
Exploring Pinup Aviator

Pin-Up Casino’s Pinup Aviator. This innovative game combines elements of chance and strategy to create an engaging and visually captivating adventure in the world of aviation.
Pinup Aviator is not your traditional casino game; it’s a one-of-a-kind experience that blends gaming, storytelling, and the thrill of taking to the skies.
Your goal is to navigate your flight path wisely, avoiding obstacles and collecting rewards along the way. With each decision you make, the excitement builds, and your potential for rewards grows.
Join us as we navigate the intricate world of Blackjack, where every decision you make can impact your gaming experience and potential rewards.
Embark on an aviation-themed adventure with Pinup Aviator, a unique game that offers a different kind of thrill.
| Game Name | Pinup Aviator |
| Game Type | Slot Machine |
| Theme | Airplane Adventure |
| Game Developer | Pin Up Casino |
| Gameplay | Predict when the plane will ascend on the runway to win multipliers. |
| Betting Range | ₹1 – ₹10,000 |
| Special Features | Auto Play, Multipliers, Free Spins |
Legitimacy & Authenticity of Pin Up Casino in India
One of the most critical aspects of online gaming is ensuring that the platform you choose is both legal and authentic, especially in a country like India with evolving regulations. Pin-Up Casino takes this matter seriously and is committed to providing a secure and trustworthy gaming environment to its players in India.
Pin-Up Casino operates under a valid license, adhering to the regulations and guidelines set forth by the relevant authorities. This license not only demonstrates the casino’s commitment to transparency but also ensures that your rights as a player are protected.

Pin Up Casino’s authenticity is underscored by its use of certified and audited gaming software. This means that the games you play are fair, and the outcomes are genuinely random. Your chances of winning are not influenced or manipulated in any way, giving you the confidence to play with peace of mind.
We will explore Pin Up Casino’s adherence to Indian laws and regulations, making sure that you’re aware of your rights and responsibilities as a player. Additionally, we’ll delve into the measures in place to protect your personal and financial information, ensuring a safe and secure gaming experience.
- Fully licensed and regulated by a recognized gaming authority
- Employs advanced encryption techniques to ensure player data security
- Offers a variety of payment methods tailored to Indian players
- Games are regularly audited for fairness by independent testing agencies
- Highly responsive customer service catering specifically to Indian clientele
- Compliant with all local regulations and laws pertaining to online gaming
- Positive reviews and testimonials from Indian players
Betting Options & Pin Up Sportsbook
While Pin-Up Casino is primarily known for its casino games, it also offers an exciting sportsbook where you can wager on your favorite sports events. This dynamic platform provides a comprehensive betting experience, allowing you to combine the thrill of casino gaming with the excitement of sports betting.
The Pin Up Sportsbook covers a wide range of sporting events, from cricket and football to tennis and horse racing, catering to sports enthusiasts of all kinds. Whether you’re a seasoned sports bettor or looking to dip your toes into the world of sports wagering, Pin Up Sportsbook has something for you.
What sets Pin Up Sportsbook apart is its user-friendly interface and competitive odds. You can place bets with ease, whether you’re on your computer or using the Pin Up mobile app. The platform also provides valuable insights and statistics to help you make informed betting decisions, enhancing your overall experience.
Betting avenues available at Pin-Up Casino, including the types of sports and events you can bet on, the odds and betting options, and how to get started with sports betting at Pin Up.
Pin Up Casino isn’t just about casino games; it also features a sportsbook that allows you to bet on your favorite sports events. We’ll explore this exciting betting avenue in detail.
- Comprehensive coverage of popular sports including cricket, football, tennis, and more
- In-play live betting options for real-time wagering action
- Competitive odds to ensure the best possible payouts for bettors
- Wide range of betting markets – from match outcomes to player statistics
- User-friendly interface that makes navigation and betting seamless
- Dedicated mobile app for betting on-the-go
- Regular promotions and bonuses tailored for sports betting enthusiasts
- Safe and secure payment methods for both deposits and withdrawals
Pin Up Casino’s Welcome Offer

Pin Up Casino understands the importance of starting your gaming on the right foot, and these welcome offers are designed to enhance your initial experience.
As a new player, you’ll have the opportunity to claim various bonuses that can include bonus funds, free spins, or other enticing rewards. These bonuses can significantly boost your playing potential and extend your gameplay, giving you more opportunities to win big.
When you join Pin Up Casino, you’ll be greeted with attractive bonuses and promotions, these offers, including betting bonuses, casino bonuses, and how to make the most of promo codes.
Betting Bonus Details
Learn about the special bonuses available for sports betting at Pin Up. The Betting Bonus at Pin Up Casino is designed to add extra excitement to your gaming experience. It rewards players with bonus funds that can be used to place bets on a wide range of sports events, from football to cricket, increasing your chances of winning big.
To unlock the Betting Bonus, players need to meet certain wagering requirements, which vary depending on the specific promotion. Once these requirements are met, you can enjoy the thrill of betting with bonus funds, making every sports match even more engaging.
Pin Up Casino frequently offers special promotions and enhanced odds for sports enthusiasts, making it an ideal platform for those who love both casino gaming and sports betting. Keep an eye on the latest promotions to maximize your Betting Bonus opportunities.
- The Betting Bonus is available to new and existing players.
- To claim the bonus, make a qualifying deposit, and enter the required promo code if applicable.
- The bonus amount you receive depends on the deposit amount and the terms of the specific promotion.
- Before withdrawing winnings generated from the bonus, you must meet the wagering requirements, which may vary based on the promotion.
- Some promotions may offer free bets as part of the bonus, allowing you to place bets without risking your own funds.
- Keep an eye on the Pin Up promotions page for the latest Betting Bonus offers and their terms and conditions.
Casino Bonus Breakdown
Casino-specific bonuses that can enhance your gaming experience.
Pin Up Casino Bonus is a fantastic way to boost your gaming adventures in the virtual casino world. This bonus provides players with additional funds that can be used to explore a wide array of exciting slot games, table games, and more.

To claim the Casino Bonus, players typically need to make a qualifying deposit and meet specific wagering requirements, which ensure fair play and responsible gaming. Once you fulfill these requirements, you’ll have extra funds at your disposal to chase those big jackpots and enjoy extended gameplay.
Pin Up Casino frequently updates its Casino Bonus offers, often including free spins and special promotions for popular casino games. By taking advantage of these bonuses, you can increase your chances of hitting the jackpot and having a thrilling casino experience.
Exclusive Promo Code
Pin Up Casino offers exclusive Promo Codes to its players, providing them with access to special promotions and bonuses. These codes can unlock various rewards, such as bonus funds, free spins, and other exciting perks.
To utilize a Promo Code at Pin Up Casino, simply enter it during the deposit or registration process, where prompted. Keep an eye on the casino’s promotions page and your email for these codes, as they can significantly amplify your gameplay and winning potential.
Whether you’re a new player looking to kickstart your casino experience or a loyal member seeking ongoing benefits, Promo Codes at Pin Up Casino are your ticket to extra excitement and rewards. Stay tuned for the latest codes to make the most of your gaming sessions.
Getting Started with Pin Up Casino

Account creation is your gateway to the thrilling world of Pin-Up Casino. Once you’ve registered, you’ll have access to a vast array of games, bonuses, and features. We’ll walk you through each step, from providing your basic information to verifying your account, so you can start playing with confidence.
Pin Up web portal, ensuring you’re comfortable with its layout and functionality.
If you’re ready to start your Pin Up game, we’ll walk you through the process of creating an account and navigating the user-friendly web portal.
Step-by-Step Pin Up Account Creation in India
Creating your Pin Up account in India is a straightforward process. Begin by visiting the Pin Up Casino website and clicking on the “Sign Up” or “Register” button to initiate the registration process.
Fill in the required personal information, choose a strong password, and provide a valid email address. This ensures the security and verification of your account.
Once you’ve completed the registration form and verified your email address through the confirmation link sent to your inbox, you’re all set to start your Pin Up gaming adventure, with access to a world of exciting casino games and bonuses.
- Visit the Pin Up Casino website.
- Click on the “Sign Up” or “Register” button to initiate the registration process.
- Fill in the required personal information, including your name, email address, and date of birth.
- Choose a strong password for your account and confirm it.
- Provide your contact details, including your mobile number and address.
- Agree to the terms and conditions of Pin Up Casino.
- Complete the registration by clicking on the confirmation link sent to your email.
- Your Pin Up Casino account is now created and ready to use.
Navigating the Pin Up Web Platform
How to access the Pin Up website and easily navigate through its various sections and features. Accessing and navigating the Pin Up web portal is a user-friendly experience. Simply log in to your Pin Up account using your registered email address and password to gain instant access to the casino’s extensive game library and features.
Once logged in, you’ll find an intuitive and well-organized interface that allows you to explore various game categories, access your account settings, and view the latest promotions. The navigation menu is designed to make it easy for you to find your favorite games and manage your casino activities effortlessly.
Pin Up’s web portal is optimized for both desktop and mobile devices, ensuring a seamless gaming experience no matter how you choose to access it. Whether you’re a seasoned player or a newcomer, the user-friendly design makes it simple to enjoy all that Pin Up Casino has to offer.
Pin-Up Account Verification Process
Account verification is a crucial step in ensuring the security and integrity of your Pin-Up Casino experience. It’s not just about compliance with regulatory requirements; it’s about protecting your account and the funds you deposit.
Pin-Up Casino account is a straightforward process that involves confirming your identity and ensuring that you are of legal age to gamble. This verification process is designed to prevent fraudulent activities and provide a secure gaming environment for all players.
To get started with account verification, you’ll typically need to provide some personal documents, such as a copy of your identification, proof of address, and possibly additional documents, depending on the casino’s requirements. These documents are securely processed and stored, adhering to strict privacy and security protocols.
Account verification at Pin-Up Casino, providing clear instructions and tips to make the process as smooth as possible.
Payment Methods at Pin Up
When it comes to online gambling, the ease and security of making deposits and withdrawals are crucial considerations. At Pin-Up Casino, you’ll find a range of payment methods that cater to different preferences and ensure smooth and secure transactions.
Choosing the right payment method is an essential aspect of your gaming experience. Some players prefer the convenience of credit cards, e-wallets, bank transfers, or even cryptocurrency. Pin-Up Casino strives to accommodate all these preferences, making it easy for you to manage your funds according to your comfort and familiarity.
Understanding the available payment methods and their associated fees, processing times, and limits is essential for a hassle-free gaming experience. We’ll provide you with all the information you need to make informed decisions and enjoy seamless transactions at Pin-Up Casino.

- Credit and Debit Cards
- E-wallets like Skrill and Neteller
- Bank Transfers
Recommended Deposit Options for Pin Up
Explore the recommended deposit methods that ensure seamless transactions at Pin Up. Pin Up Casino offers a variety of reliable and secure deposit methods to ensure a hassle-free experience for players. Among the recommended deposit options are credit and debit cards, e-wallets like Skrill and Neteller, and bank transfers, providing you with flexibility and convenience in funding your casino account.
E-wallets are often a preferred choice due to their fast processing times and added security. They allow for quick deposits and withdrawals, making your gaming sessions smoother and more efficient.
While Pin Up Casino provides multiple deposit methods, it’s essential to choose the one that aligns with your preferences and needs, ensuring a seamless and enjoyable gaming experience from the moment you fund your account.
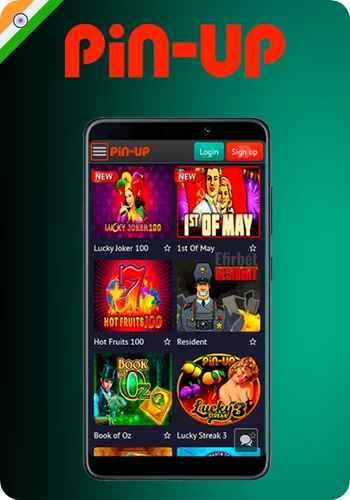
Exploring Pin Up’s Mobile Gaming
Pin-Up Casino offers a robust mobile experience that allows you to access your favorite games and features from your smartphone or tablet. Mobile gaming is all about convenience, and Pin-Up Casino’s mobile offerings are designed to deliver just that.

Pin-Up Casino provides a dedicated mobile application for both Android and iOS devices, allowing you to download and install the casino directly on your mobile device. This application offers a user-friendly interface, optimized for touchscreens, and provides a smooth and enjoyable gaming experience on smaller screens.
In addition to the mobile app, Pin-Up Casino also offers a responsive mobile interface. This means that you can access the casino directly through your device’s web browser, without the need for any downloads or installations. The mobile interface adapts seamlessly to different screen sizes, ensuring that you can play comfortably on any mobile device.
Pin-Up Casino’s mobile offerings in detail, guiding you through the process of downloading and using the mobile app. How the mobile interface works, including how to access your account, make deposits and withdrawals, and enjoy a wide range of games on your mobile device.
Mobile App Availability
Download the Pin Up mobile app and start play the convenience of playing on your smartphone or tablet. Pin Up Casino offers a dedicated mobile app for both iOS and Android devices, allowing players to enjoy their favorite casino games and sports betting on their smartphones or tablets with ease.
The Pin Up mobile app provides a seamless and user-friendly experience, ensuring that you can access the casino’s extensive game library, place bets, and manage your account while on the go, providing flexibility and convenience for mobile gaming enthusiasts.
Pin Up’s Casino Mobile Interface
Explore Pin Up’s responsive design that adapts seamlessly to various mobile devices for a hassle-free gaming experience. Pin Up’s casino mobile interface is thoughtfully designed for user-friendliness, featuring intuitive navigation that allows you to effortlessly explore games, promotions, and account settings on your mobile device.
Whether you’re using a smartphone or tablet, Pin Up’s mobile interface provides a responsive and visually appealing platform, ensuring a smooth and enjoyable casino experience on the smaller screen while maintaining all the features of the desktop version.
Delving into Pin Up Casino Support & Customer Service
Customer support is a cornerstone of any reputable online casino, and Pin-Up Casino is no exception. It’s essential to know that you have a dedicated support team ready to assist you with any questions or issues that may arise during your gaming.
Pin-Up Casino’s support team, ensuring that help is always just a click or a call away. Whether you prefer live chat, email, or phone support, Pin-Up Casino offers multiple channels to suit your needs.
But customer support is not just about being accessible; it’s also about being knowledgeable and responsive. We’ll delve into the mechanics that make Pin-Up Casino’s support team stand out, including their expertise in resolving player inquiries, their availability around the clock, and their dedication to providing a seamless gaming experience.

Pin Up Casino places a strong emphasis on customer support. Find out how to connect with their dedicated support team and learn about the mechanics that ensure your gaming experience is smooth and enjoyable.
- Available 24/7 to assist players with any inquiries or concerns
- Dedicated live chat feature for instant resolutions
- Email support with timely responses usually within 24 hours
- Comprehensive FAQ section addressing common questions and issues
- Professional and courteous customer service representatives
- Support available in multiple languages to cater to a global audience
- Phone support for more detailed or urgent matters
- Feedback system to continually improve service quality
Connecting with Pin Up Casino Support Team
Pin Up Casino’s support team is easily accessible through various channels, including live chat, email, and phone support, providing prompt and helpful assistance to address your queries and concerns.
Whether you have questions about account verification, bonuses, or any other aspect of your gaming experience, the Pin Up support team is available around the clock to ensure that you receive the assistance you need for a smooth and casino.
Behind-the-Scenes Support at Pin Up Casino
Learn about the systems and processes that work behind the scenes to provide you with a seamless gaming experience at Pin Up. Behind the scenes, Pin Up Casino operates with robust backend mechanics to ensure the security of player data and the integrity of the gaming experience. Advanced encryption technology and rigorous data protection measures are in place to safeguard your personal and financial information.
The casino’s backend system also includes sophisticated algorithms for game fairness and random number generation, assuring players of a fair and transparent gaming environment while maintaining the highest standards of security.
Pros and Cons of Pin Up Casino
Like any online casino, Pin Up Casino comes with its unique set of advantages and drawbacks that every player should consider before getting started. Let’s explore what makes Pin Up Casino stand out and where it may have room for improvement.

Advantages:
- Diverse Game Selection: Pin Up Casino offers a vast and diverse range of games, ensuring that players of all preferences can find something to enjoy.
- Generous Bonuses: Pin Up Casino welcomes players with enticing bonuses, enhancing the overall gaming experience and providing extra value.
- Mobile-Friendly: With a dedicated mobile app and a responsive mobile interface, Pin Up Casino allows you to enjoy your favorite games on the go, anytime, and anywhere.
- Customer Support: The casino provides reliable and responsive customer support, ensuring that players can get assistance with their questions and concerns.
- Secure Payment Options: Pin Up Casino offers a variety of secure payment methods, making transactions safe and convenient for players.
Drawbacks:
- Country Restrictions: Pin Up Casino may not be accessible in certain countries, which can limit its availability to a global audience.
- Wagering Requirements: Like many online casinos, Pin Up has wagering requirements for bonuses that players must meet before they can withdraw their winnings.
- Limited Language Options: The casino may have limitations in terms of language support, potentially creating challenges for players who don’t speak English.
By understanding both the strengths and areas for improvement at Pin Up Casino, you can make informed decisions and have a more enjoyable gaming experience.
Insights from Pin Up Gamers: Testimonials and Reviews
Read real-life testimonials and reviews from players who have shared their experiences with Pin Up Casino. Their insights can provide you with valuable perspectives on what to expect.
- Many players commend the swift and hassle-free withdrawal process.
- The game selection, especially the slots variety, has received widespread praise.
- Users frequently highlight the user-friendly interface both on desktop and mobile platforms.
- The live casino section, with its immersive experience, is a favorite among many.
- Regular bonuses and promotions are often cited as a major plus point.
- Customer support, especially the live chat feature, has garnered positive feedback for its efficiency.
- Several players appreciate the casino’s commitment to responsible gaming.
- While many reviews are positive, some users have given constructive feedback, helping the casino to further refine its offerings.
Conclusion

Pin Up Casino has established itself as a premier online gaming platform, offering a rich blend of casino games, sports betting, and an immersive live gaming experience. Catering to a wide range of preferences, it stands out with its comprehensive game selection, attractive bonuses, and commitment to providing a secure and enjoyable environment for players in India.
With its mobile-friendly interface, robust customer support, and diverse payment options, Pin Up Casino ensures a seamless and flexible gaming experience. Whether you are a seasoned gambler or new to the online casino world, Pin Up offers a welcoming platform to engage in your favorite games, with the added thrill of potential rewards.
Pin Up Casino represents a harmonious blend of entertainment, convenience, and security, making it a compelling choice for online gaming enthusiasts. Its dedication to providing a high-quality gaming experience is evident in every aspect of its operation, from game variety to user support.